

Managing an Elasticsearch cluster can be complex, costly, and time-consuming - especially for large organizations that need to index and analyze log data at scale.
In this short guide, we’ll walk you through the process of creating an Amazon S3 bucket, configuring an IAM role that can write into that bucket, and attaching that IAM role to your Amazon S3 instance - all using the AWS Command Line Interface (CLI). We’ll also share how you can use AWS CLI to automate the process of shipping logs to Amazon S3.
Completing these tasks will enable you to quickly and easily get data into Amazon S3 buckets, where it can be indexed and analyzed using ChaosSearch.

Getting Started with AWS CLI
AWS Services Can Ship Logs to S3
Logs on AWS are often formatted as line-delimited JSON objects and gzip’d into a timestamped file. Many AWS services have the built-in capability to ship their logs to Amazon S3 object storage. Examples include:
- AWS CloudTrail - An AWS service that logs API calls made on your account by users, services, and other AWS resources.
- Elastic Load Balancing (ELB) - An AWS service that distributes incoming traffic across multiple EC2 instances, containers, or IP addresses.
- Amazon CloudFront - A content delivery network (CDN) service.
- Amazon CloudWatch - An application monitoring and observability tool that collects telemetry data from resources, applications, and services that run on AWS.
AWS customers can use the AWS CLI to interact with these services and ship the log data they collect to an S3 bucket. From there, AWS customers can set up a security data lake or investigate CloudFront logs to troubleshoot cloud infrastructure and services.
Watch this quick demo to learn how to analyze CloudTrail logs with ChaosSearch:
What is AWS Command Line Interface?
The AWS CLI is a unified tool that allows AWS customers to manage AWS services from the command line shell, as well as automate those services using scripts. AWS customers can use the CLI to:
- Create, delete, and manage AWS resources, including EC2 instances, S3 buckets, RDS databases, and more.
- Configure AWS services, IAM roles, permissions, and access policies.
- Automate repetitive tasks and workflows with scripts or pre-built automation tools.
- Access telemetry data from AWS services for analysis and troubleshooting.
- Manage security settings, encryption, and access keys for AWS resources.
Installing the AWS CLI
To start using AWS CLI, you’ll need an AWS account and valid IAM credentials. When you’re ready to get started, you’ll need to install or gain access to the AWS CLI using one of several methods described in the AWS CLI user guide.
The recommended method for accessing the AWS CLI is to install the latest version on your machine. The AWS CLI user guide contains instructions for installing CLI on Linux, MacOS, or Windows. You can also download and run the AWS CLI installer for Windows, MacOS, or Linux on this page. AWS CLI comes pre-installed on Amazon Linux AMI.
Another option for accessing the AWS CLI is through AWS CloudShell, a browser-based shell that provides AWS customers with access to the CLI and other development tools.
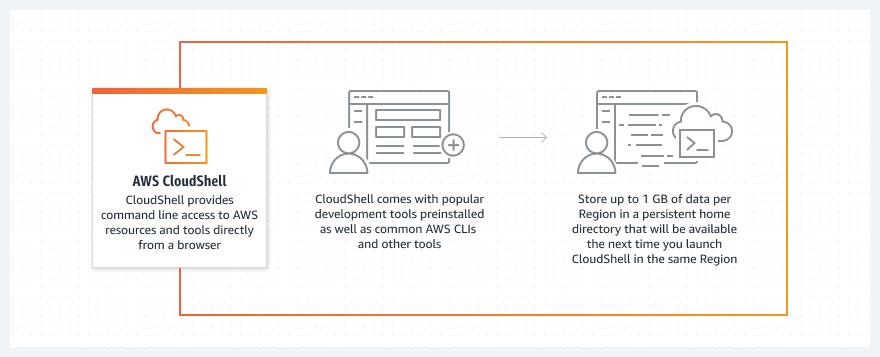
AWS users can access the AWS CLI in browser via AWS CloudShell.
Once you have installed AWS CLI, you can use the “AWS S3 Copy” or “AWS S3 Sync” commands to execute a one-time action of moving data up to be indexed. Or, you can use the AWS CLI and follow the instructions in this blog to start shipping data from an index.
How to Create Buckets in S3 with AWS CLI
In this tutorial, we’re going to create an Amazon S3 bucket, configure an IAM role that can write to that bucket, and use an instance profile to associate that IAM role with our existing EC2 instance. Once the profile is created and associated with our existing EC2 instance, we can use the permissions in the associated IAMrole to push data to the created S3 bucket.
Warning: These instructions are mostly CLI. Some instructions include links to AWS docs for doing the same with the AWS console.
Do you have an existing instance?
We’re going to assume you have an instance of Amazon EC2 running already, and you just need some help making a bucket and giving the instance permissions to write to it.
Do you not have an instance? Check out the AWS Quickstart - Launch Instance and you should have an instance in no time.
Creating an Amazon S3 Bucket with AWS CLI
Create a bucket to push your logs to.
See also: AWS Quick Start Guide: Back Up Your Files to Amazon Simple Storage Service
- Create a test bucket:
aws s3 mb s3://chaos-blog-test-bucket
- Did you get an error? S3 buckets are global, so if someone else has created a bucket with the same name, you’re going to have to substitute your own bucket name for chaos-blog-test-bucket for the rest of this post.
- List the objects in the bucket:
aws s3 ls s3://chaos-blog-test-bucket
Done! Your bucket is empty for now, keep reading to remedy this.

Creating an IAM Role with AWS CLI
Cloud administrators manage access in AWS IAM by creating policies and attaching them to IAM identities or AWS resources. A policy is an object in AWS that defines access/security permissions for the associated identity or resource. Before a policy can be implemented, it must be attached to an IAM role. The tooling for AWS dictates that customers should create the IAM role, then create the policy separately and attach it to the role on creation.

AWS users can configure permissions, IAM policies, and IAM identities using the AWS CLI.
For more information on IAM roles, policies, and permissions, check out IAM roles for Amazon EC2.
Note: Remember, the bucket namespace is global and the namespace is shared by all AWS accounts. This means that after a bucket is created, the name of that bucket cannot be used by another AWS account in any AWS Region (until the bucket is deleted). Don’t forget to update the name of the bucket you choose for all the following commands.
- Create a role with no permissions:
aws iam create-role --role-name WriteToBucket_Role --assume-role-policy-document '{"Version":"2012-10-17","Statement":[{"Effect":"Allow","Principal":{"Service":"ec2.amazonaws.com"},"Action":"sts:AssumeRole"}]}'
- Create a policy that can write into that bucket, and attach it to the role we just created:
aws iam put-role-policy --role-name WriteToBucket_Role --policy-name WriteToBucket_policy --policy-document '{"Version":"2012-10-17","Statement":[{"Effect":"Allow","Action":"s3:*","Resource":["arn:aws:s3:::chaos-blog-test-bucket","arn:aws:s3:::chaos-blog-test-bucket/*"]}]}'
- Create an instance profile for you to attach to an instance:
aws iam create-instance-profile --instance-profile-name WriteToBucket_profile
- Attach the role to the profile:
aws iam add-role-to-instance-profile --instance-profile-name WriteToBucket_profile --role-name WriteToBucket_Role
- Attach profile to your running instance. Here you’ll have to know the instance id of the instance you’re adding the IAM profile to:
aws ec2 associate-iam-instance-profile --instance-id YOUR_INSTANCE_ID --iam-instance-profile Name="WriteToBucket_profile"
- Go checkout your AWS console, and you can see the IAM policy is now associated.
Your instance should now be able to write into that bucket.
Try it out:
- ssh to your instance
- Create an empty file:
touch x
- Copy a new empty file to the bucket
aws cp x s3://chaos-blog-test-bucket
- You should now be able to see the file in the bucket:
aws s3 ls s3://chaos-blog-test-bucket
- If the copy fails, double check the IAM permissions, and that the instance has the IAM role attacked in the aws console.
Automating Log Ingestion to Your Amazon S3 Buckets
Now that we’ve created an S3 bucket with Amazon CLI, given ourselves permission to write data to that bucket, and added our first object in the bucket, we can use AWS CLI to automate the process of ingesting log data into our Amazon S3 bucket. Below, we share two strategies for automating log ingest with AWS CLI:
- Scheduling a Cron Job with AWS CLI in Linux
- Monitoring and shipping logs with Watchdog and watchmedo

The AWS CLI + Cron
A cron job that uses the AWS CLI to copy a file to a bucket on a schedule.
Let’s try a quick example uploading /var/log/syslog to an S3 bucket. Are you still on that instance that can write to the bucket? Great. Try running this.
echo "*/5 * * * * root /usr/bin/aws s3 cp /var/log/syslog s3://chaos-blog-test-bucket/${HOSTNAME}/" | sudo tee /etc/cron.d/upload_syslog
Now every five minutes s3://chaos-blog-test-bucket/${HOSTNAME}/syslog will be uploaded to the test bucket.
Depending on your OS/distro, you can check the cron log with tail -f /var/log/crond or journal -fu crond. You should see an execution in the log within 5 minutes.
The AWS CLI + Watchdog
Watchdog is a utility that watches a directory for changes, and executes a command when an event happens. watchmedo is a CLI tool that uses watchdog to execute commands on file creation / destruction. They are both related to each other, and pretty awesome.
Let’s do something a bit more dynamic than the cron job.
- Install watchdog and watchmedo:
python3 -m pip install watchdog[watchmedo]
- Upload syslog every time it changes:
watchmedo shell-command \
   --patterns="syslog" \
   --interval=10 \
   --wait \
   --command="/usr/bin/aws s3 cp \${watch_src_path} s3://chaos-blog-test-bucket/watchdog/${HOSTNAME}/syslog" \
   /var/log/
Now every time /var/log/syslog is written to, s3://chaos-blog-test-bucket/watchdog/${HOSTNAME}/syslog will be updated.
Once this is done, tt’s going to upload syslog constantly, so this is a better method for a log that only updates a few times a day. Or perhaps the pattern should be for *.gz and you only ship rotated logs.
The AWS CLI + Watchdog + Boto
Boto is the AWS SDK for Python, which developers can use to write programs or scripts that use Amazon services. We can use the python watchdog module with some standard Boto to do what watchmedo was doing programmatically. This code is pretty hacky / POC level, but it should get you started on your way to playing with using watchdog and boto to push interesting data into S3.
The script below will:
- Watch a directory
- If a file changes, put the file in a dict
- Every X seconds, loop thru that dict, and upload each file to the S3 bucket hardcoded to the global var, s3_bucket
#!/usr/bin/env python3

import boto3
import os
import socket
import time
from fnmatch import fnmatch
from botocore.exceptions import ClientError
from watchdog.events import FileSystemEventHandler
from watchdog.observers import Observer

##
## Globals
##

s3_bucket       = "chaos-blog-test-bucket" # what bucket to upload to
dir_to_watch    = "/var/log/"           # what directory to watch for new files
file_regex      = "*syslog"           # what files should match and be uploaded
s3_prefix       = socket.gethostname()     # this string will be prefixed to all uploaded file names
upload_interval = 30                       # how long to sleep between uploads

# global file list
file_queue = dict()

##
## file modification handler
##

class FileEventHandler(FileSystemEventHandler):
    def on_any_event(self, event):
        print(event)
        if fnmatch(event.src_path, file_regex):
            print ("File matched")
            if event.__class__.__name__ == 'FileModifiedEvent' or event.__class__.__name__ == 'FileCreatedEvent':
                print("Will try to upload %s" % event.src_path)
                file_queue[event.src_path] = "discovered"
            if event.__class__.__name__ == 'FileDeletedEvent':
                if event.src_path in file_queue:
                    print("File was deleted before it could be uploaded: %s" % event.src_path)
                    del(file_queue[event.src_path])
        else:
            print("Not following %s" % event.src_path)

##
## Upload files to S3
##

def upload_files():
    print("Fired upload_files")

    sesh = boto3.session.Session()
    s3_client = sesh.client('s3')

    tmp_files = dict(file_queue)
    for file in tmp_files:
        del(file_queue[file])

        print ("File: %s" % file)

        if os.path.isfile(file):
          print("Uploading %s (%i bytes)" % (file, os.path.getsize(file)))
          with open(file, 'rb') as data:
              s3_client.upload_fileobj(data, s3_bucket, "{}/{}".format(s3_prefix, file))

          print("Uploaded: %s" % file)
        else:
          print("%s isn't a file" % file)

##
## Main
##

event_handler = FileEventHandler()
observer = Observer()
observer.schedule(event_handler, dir_to_watch, recursive=False)
observer.start()

# stay awake...
try:
    while True:
        print("Sleeping %i seconds" % upload_interval)
        time.sleep(upload_interval)
        upload_files()
except KeyboardInterrupt:
    print(file_queue)
    print("Attempting one last upload before exiting.")
    upload_files()
    observer.stop()
observer.join()
You can play around with this Python script by changing the file, the mask, or the interval. This script weighs in at about 50 megs of ram – it’s not super robust, but it’s surprisingly powerful.
Analyze Log Data in Amazon S3 with ChaosSearch
In this blog, we shared how AWS customers can create an Amazon S3 bucket, configure an IAM identity with permissions to write data to that bucket, and automate the process of ingesting logs into that bucket - all using the AWS CLI.
Once log data is landed in S3, AWS customers can index, query, and analyze the data using ChaosSearch. ChaosSearch transforms your cloud object storage into a live analytics database, supporting log analytics use cases from security operations and threat hunting to user behavior monitoring, IT observability, and troubleshooting cloud services.
Ready to learn more?
Check out our white paper Beyond Observability: The Hidden Value of Log Analytics to learn more about analyzing your log data with ChaosSearch.

