

ChaosSearch activates your cloud object storage for analytics at scale via multi-API access, with no data movement, no sharding nor re-indexing, and no data retention trade-offs.
To help engineers and IT leaders experience the power of ChaosSearch for themselves, we’ve made it easier than ever to get started with our free trial experience.
If you’ve got data sitting in cloud storage with pent-up demand to search and analyze it, we have good news for you -- you’re just minutes away from activating your data lake, creating your first index, and making all of your data searchable and available for analysis with ChaosSearch.
In this short guide, we’ll walk you through the free trial registration process, connecting your Amazon S3 account, and creating your first searchable index using ChaosSearch.
Let’s get started!

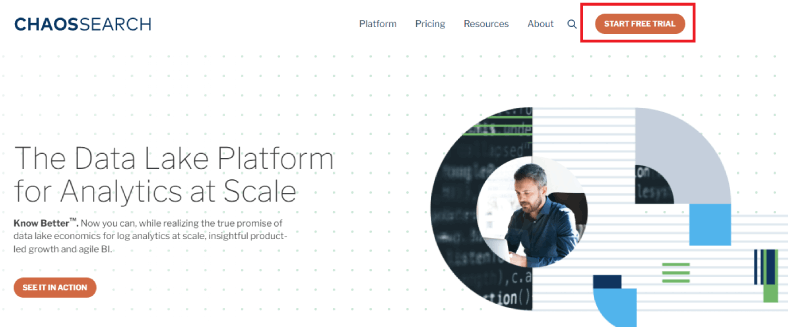
Begin at the ChaosSearch Home Page
Register For Your Free Trial
To get started, you’ll want to click the “Start Free Trial” button on our home page.
Next, you’ll land on our free trial registration page. You’ll need to enter some basic personal details to create and activate your ChaosSearch account.
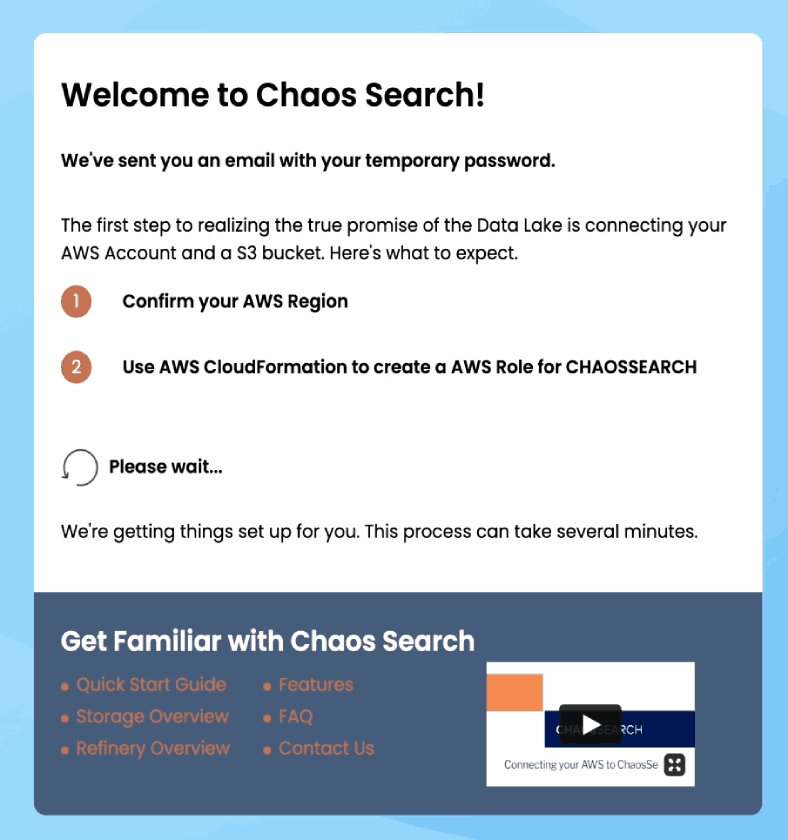
After filling in your details and clicking on “Get Started,” we’ll start provisioning resources for your free trial of ChaosSearch. You can learn more about ChaosSearch while you wait by visiting our Quick Start Guide, Feature overview pages (Chaos Index®, Chaos Fabric®, and Chaos Refinery®), FAQ sheet & more.
We’ll also send you an email with your temporary account password in case you get disconnected.
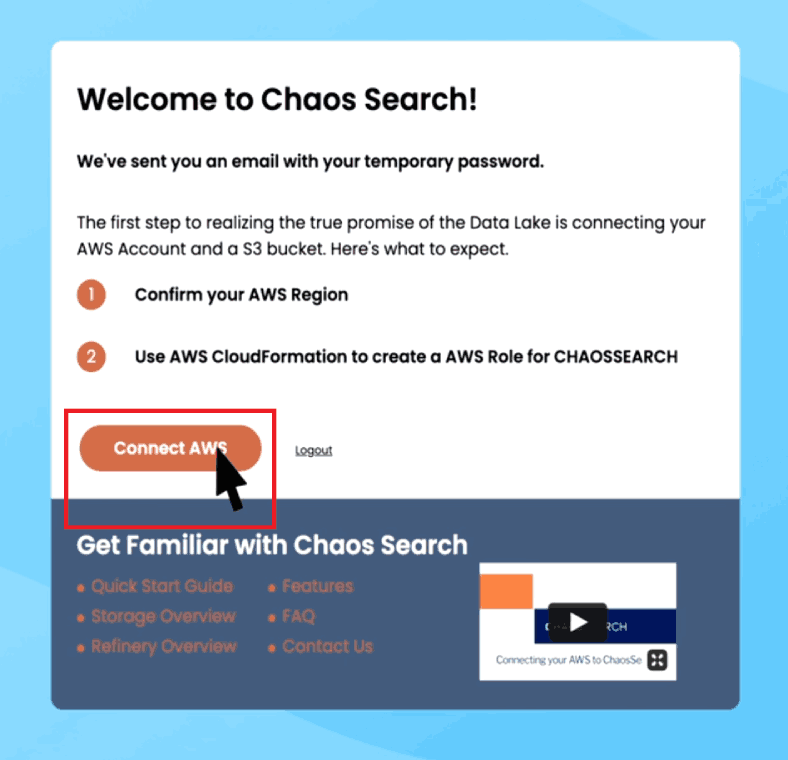
Once we finish provisioning your trial account, the “Connect AWS” button will appear. Click on the button when you’re ready to connect your AWS account with ChaosSearch and launch your first data lake.
WATCH: New ChaosSearch Demo Recording
Connecting AWS with ChaosSearch
In this step, we’ll show you how to connect your AWS account with ChaosSearch. To make it easy, we’ve automated the entire process with our AWS integration template.
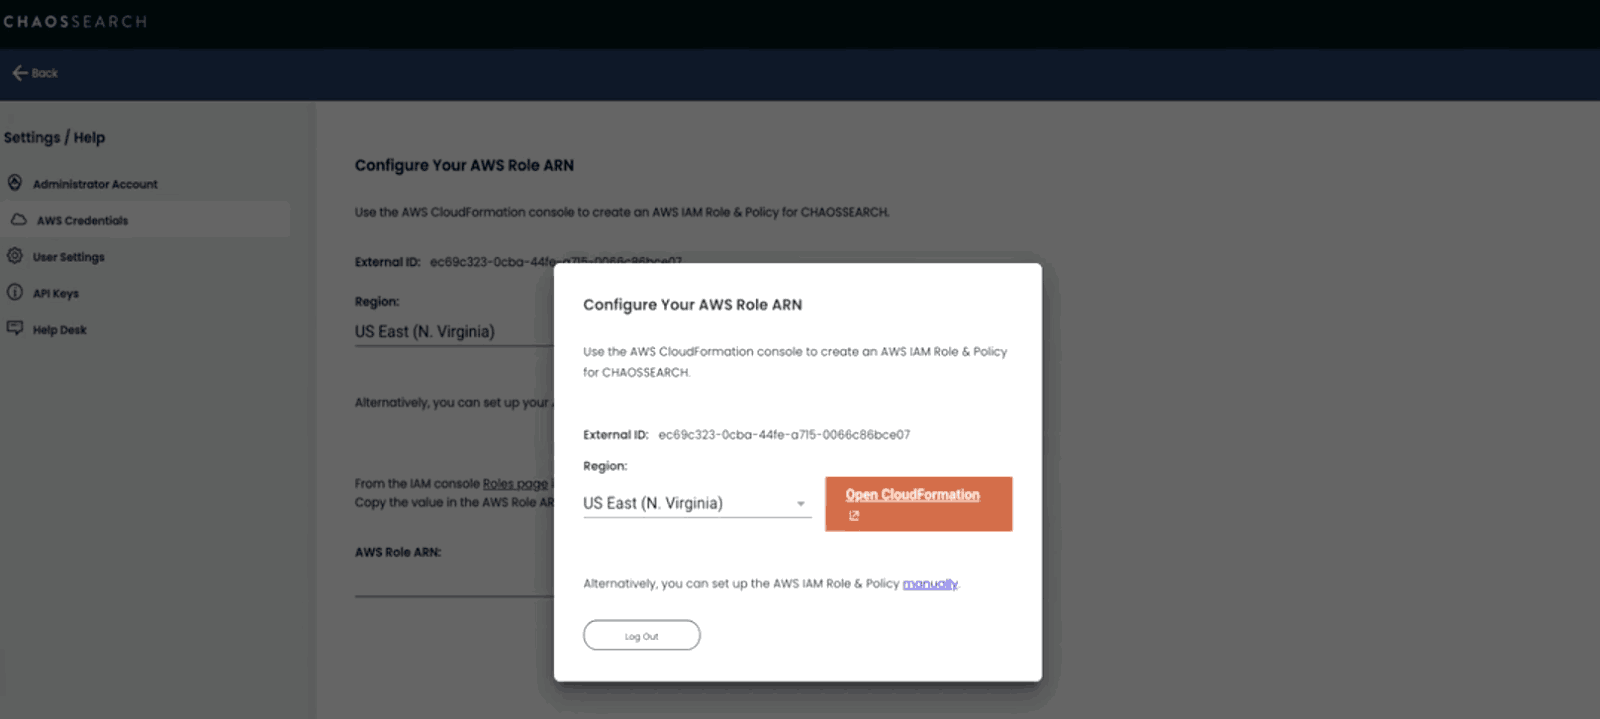
After you click on “Connect AWS”, you’ll be signed into the ChaosSearch platform for the first time. A dialog box will appear, prompting you to configure your AWS Role ARN. This process creates an AWS IAM Role & Policy for ChaosSearch, allowing our platform to read, index, and write data into your Amazon S3 buckets. You’ll also see your ChaosSearch External ID, which you’ll need in the next step.
To get started, you’ll need to confirm your region by choosing from the dropdown menu and click the “Open CloudFormation” button.
Clicking on “Open CloudFormation” will open the “Quick create stack” page of AWS CloudFormation and apply our AWS Integration template, specifying the roles and permissions needed for ChaosSearch to index data in your Amazon S3. You must log in to your AWS account to complete this step.
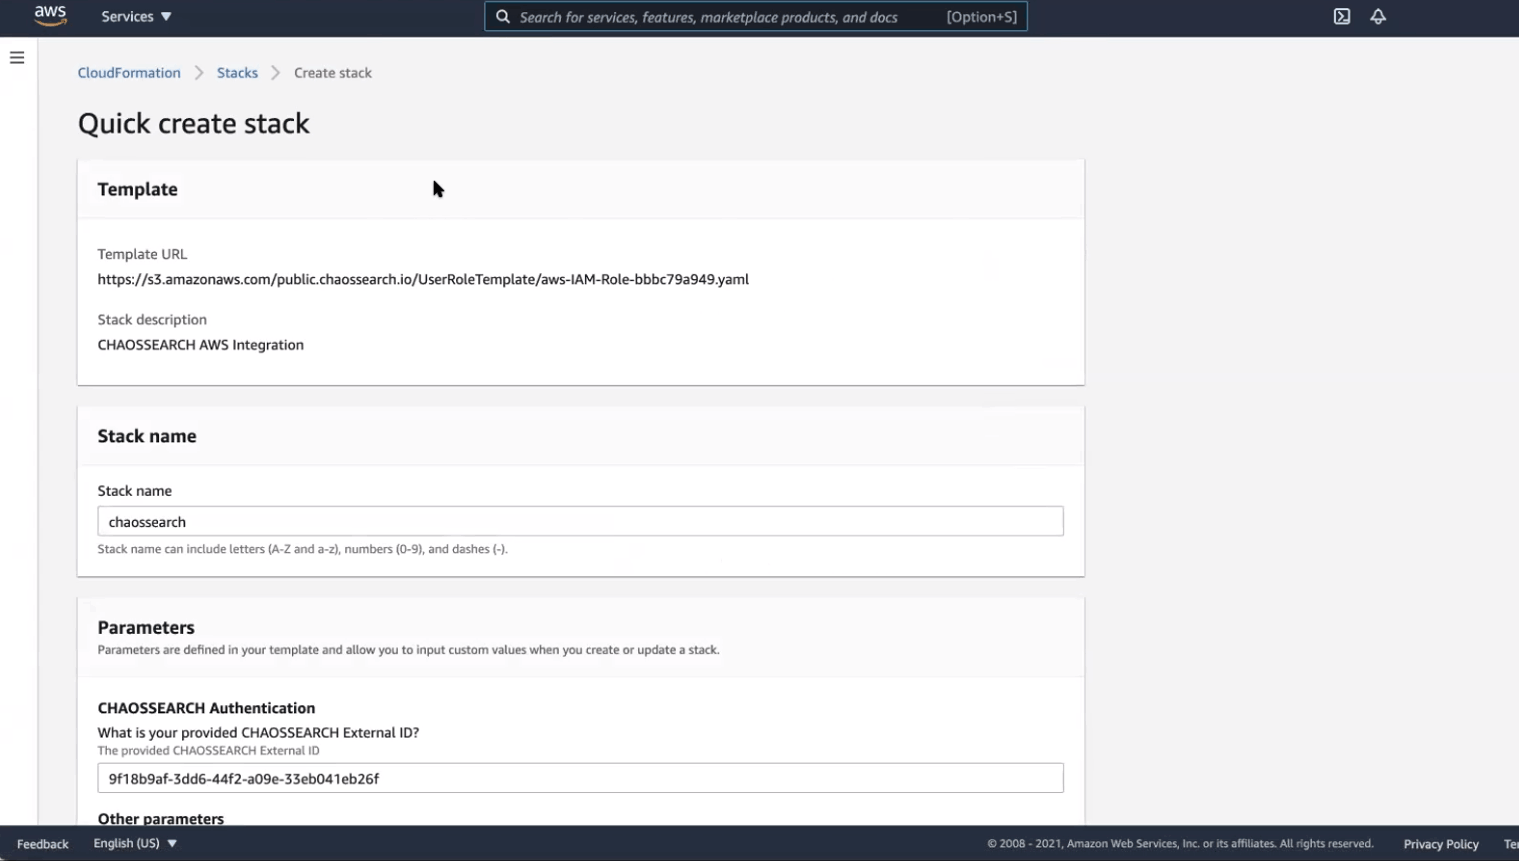
On the Quick create stack page, you’ll be prompted to specify a name for your Stack. You’ll also need to enter your ChaosSearch External ID and specify the name of the S3 bucket whose contents you want to index.
We’ll also create a new bucket in your Amazon S3, one that ChaosSearch will use to store any data you choose to index.
Once finished, click on “Create Stack” at the bottom of the page.
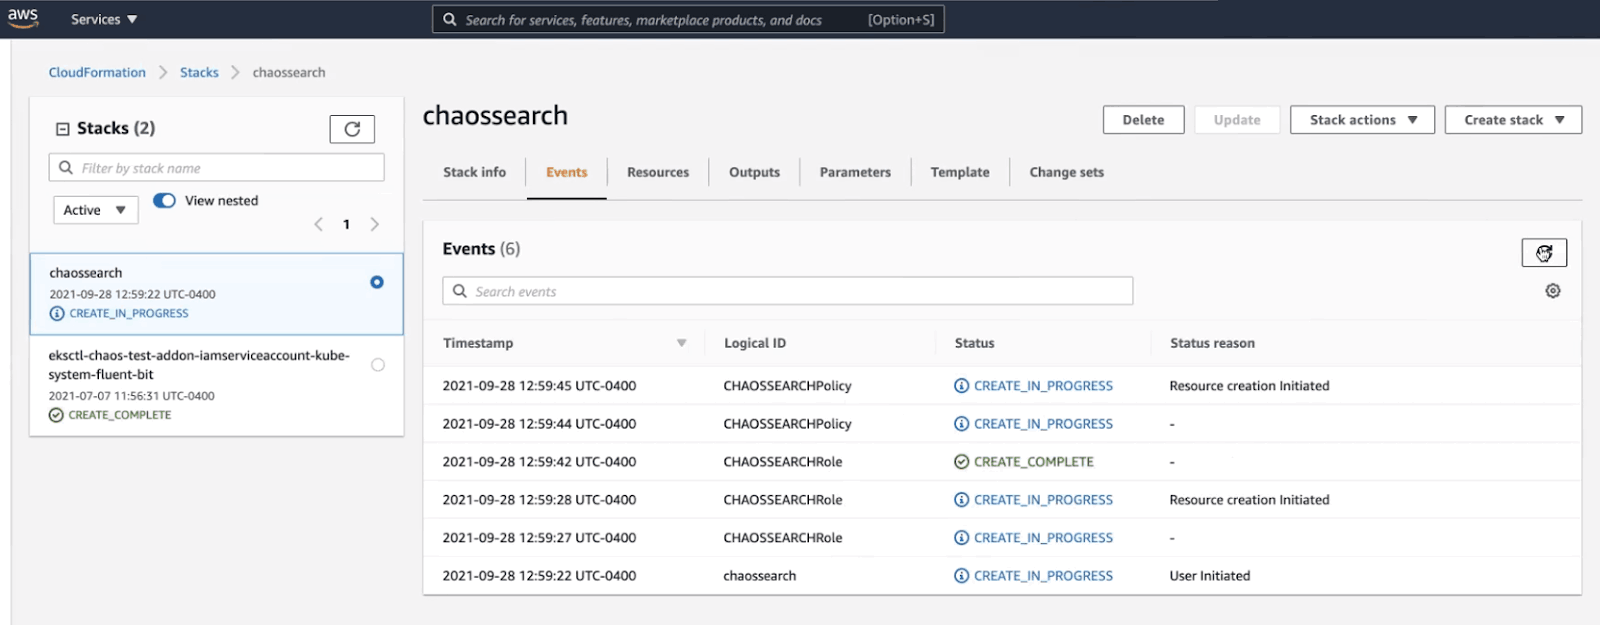
You will land on the “Events” tab of your newly created stack, where you can receive status updates as your new roles and policies are being developed.
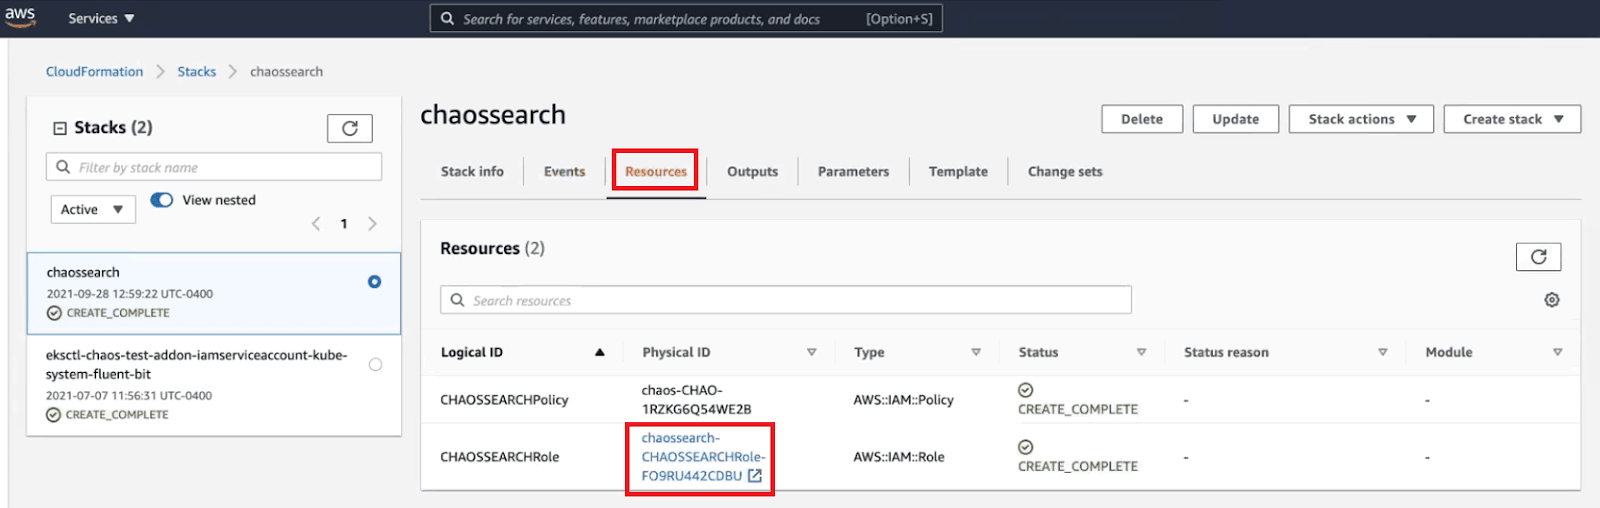
Once the process is complete, navigate to the “Resources” tab and click on the link under “Physical ID” next to your newly created role with the logical ID “ChaosSearchRole.”
You will be taken to a summary of your newly created role, where you’ll see the Role ARN at the top of the page.
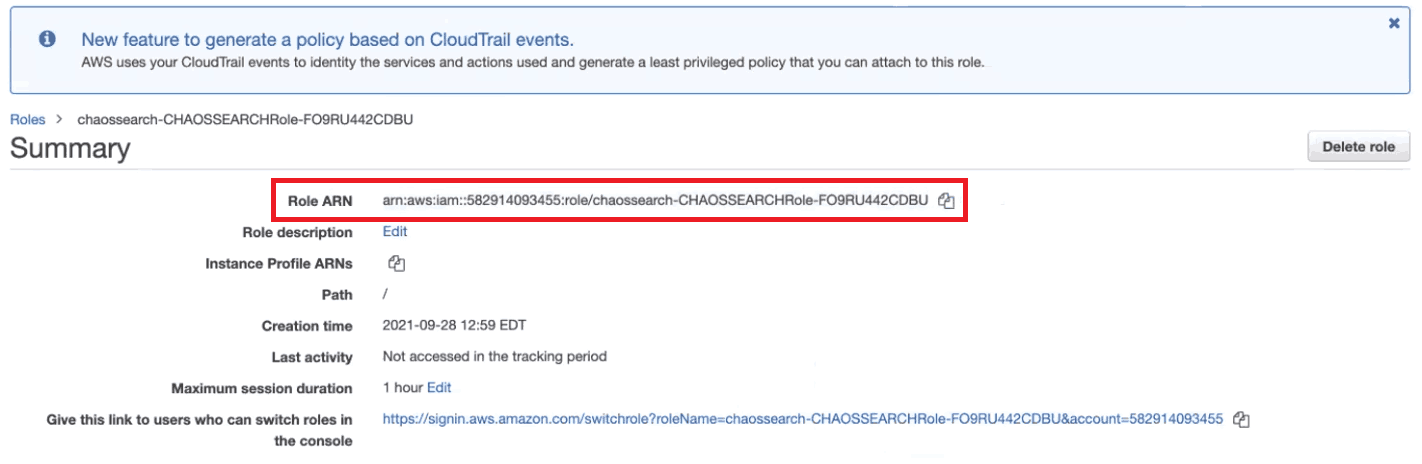
Copy this Role ARN and paste it into the dialog box on the ChaosSearch interface to complete the integration.
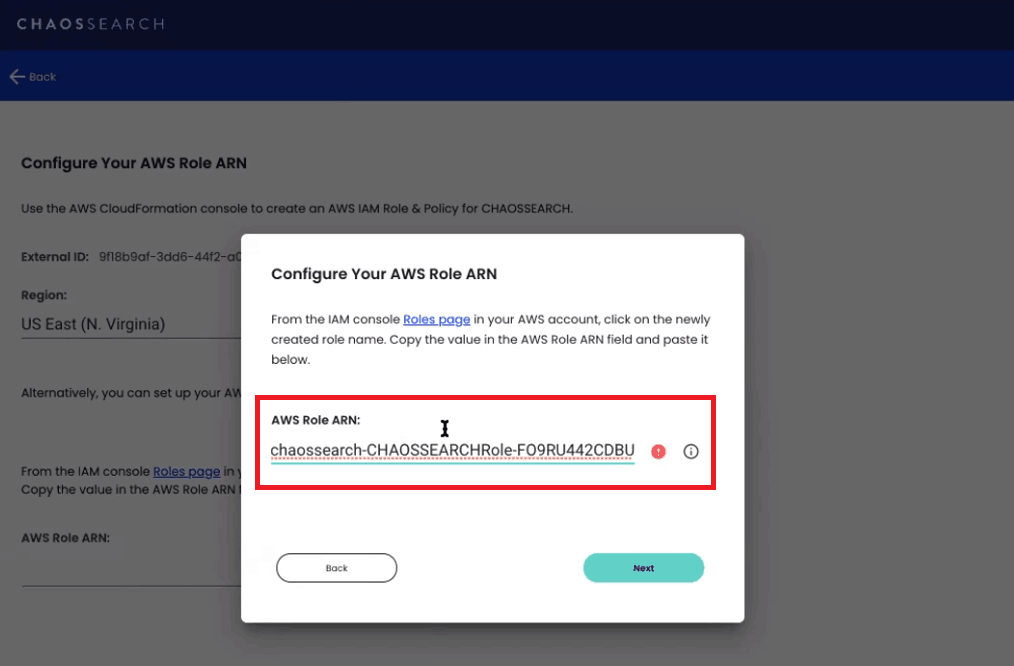
Once you click Next, you should see a message indicating that your AWS Role ARN was successfully configured. You can now start indexing and analyzing your data with ChaosSearch.
Create Your First Index Using ChaosSearch
ChaosSearch works by reading data from an S3 bucket of your choice, indexing the data, then writing the indexed data into a separate S3 bucket created using our AWS integration template. The “read” and “write” buckets live in your Amazon S3, so you retain complete control and ownership over your data.
To create your first index, you’ll need to navigate to the Storage tab on the ChaosSearch UI and choose an S3 bucket with some data you want to index.
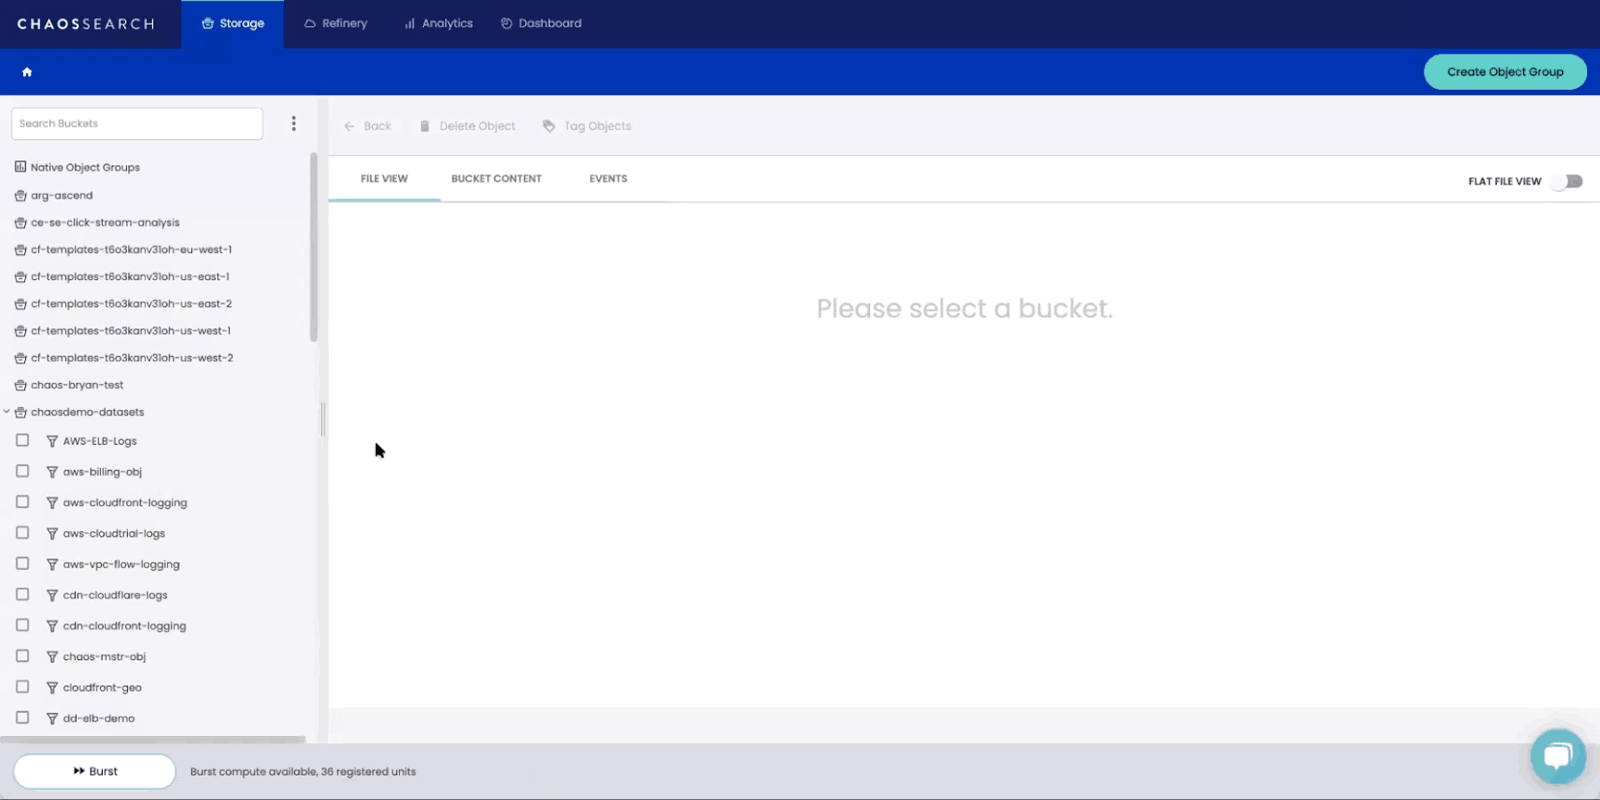
You’ll see a list of the S3 buckets exposed to ChaosSearch via the IAM role you provided the role ARN for above. Click on the bucket that you’d like to index.
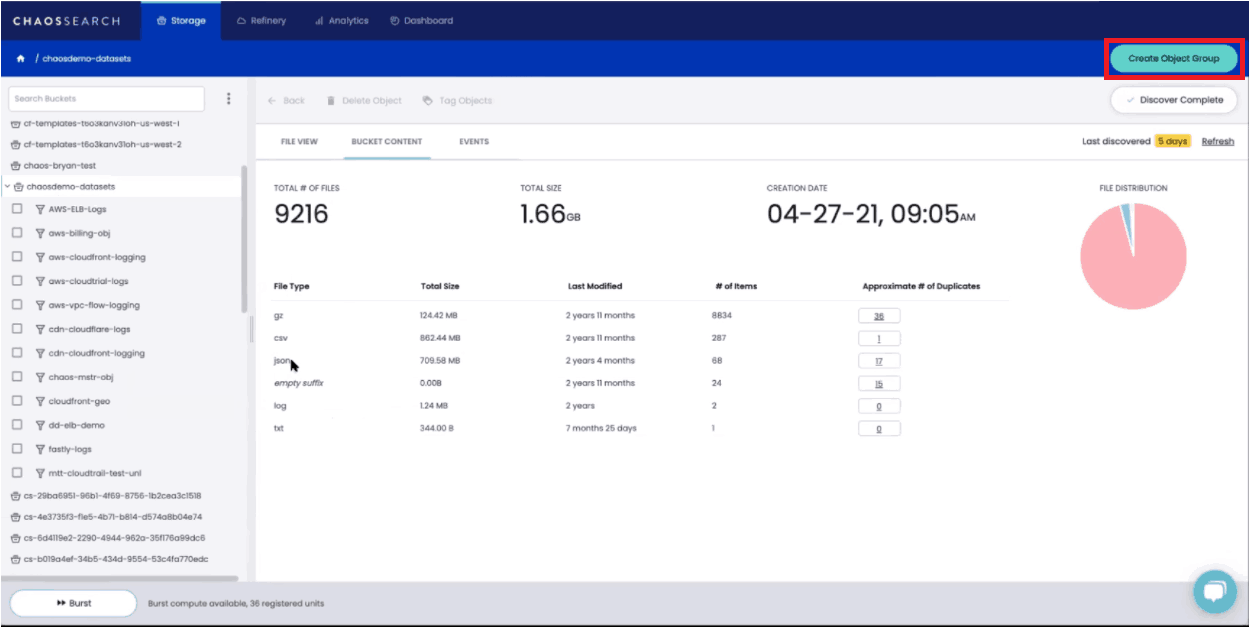
If your Amazon S3 bucket contains data from multiple sources, you will want to filter and segment the data logically by creating object groups before you start to index.
You can do this by clicking on the “Create Object Group” button.
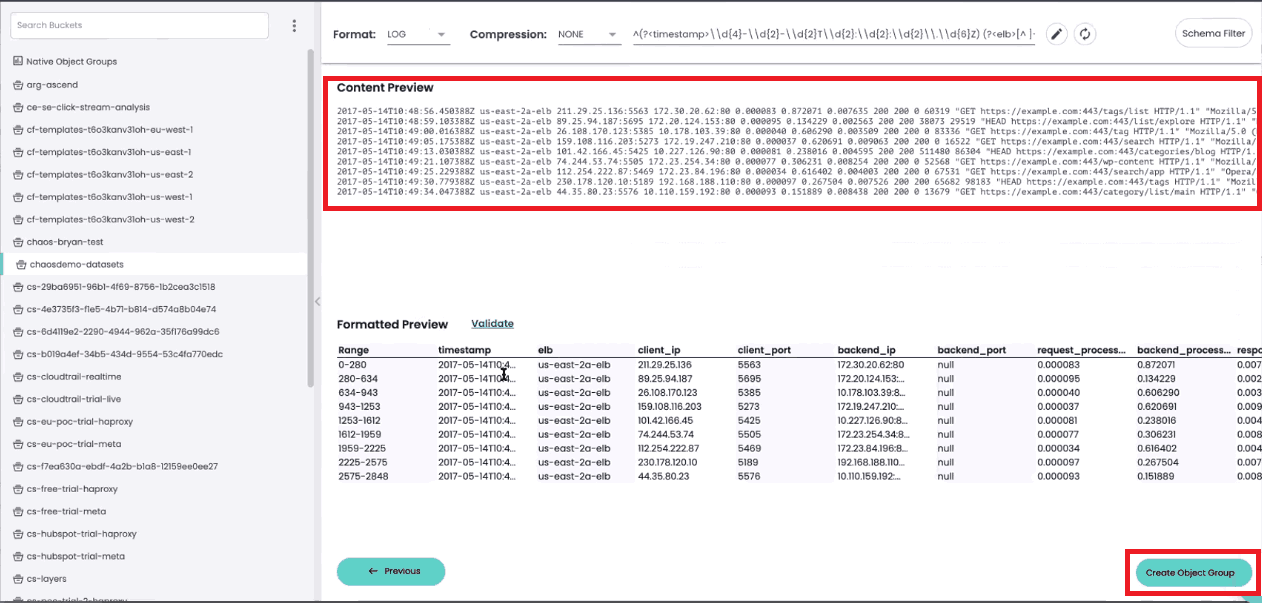
You can group objects by prefix, using object filters, or create a customized filter by writing a REGEX expression.
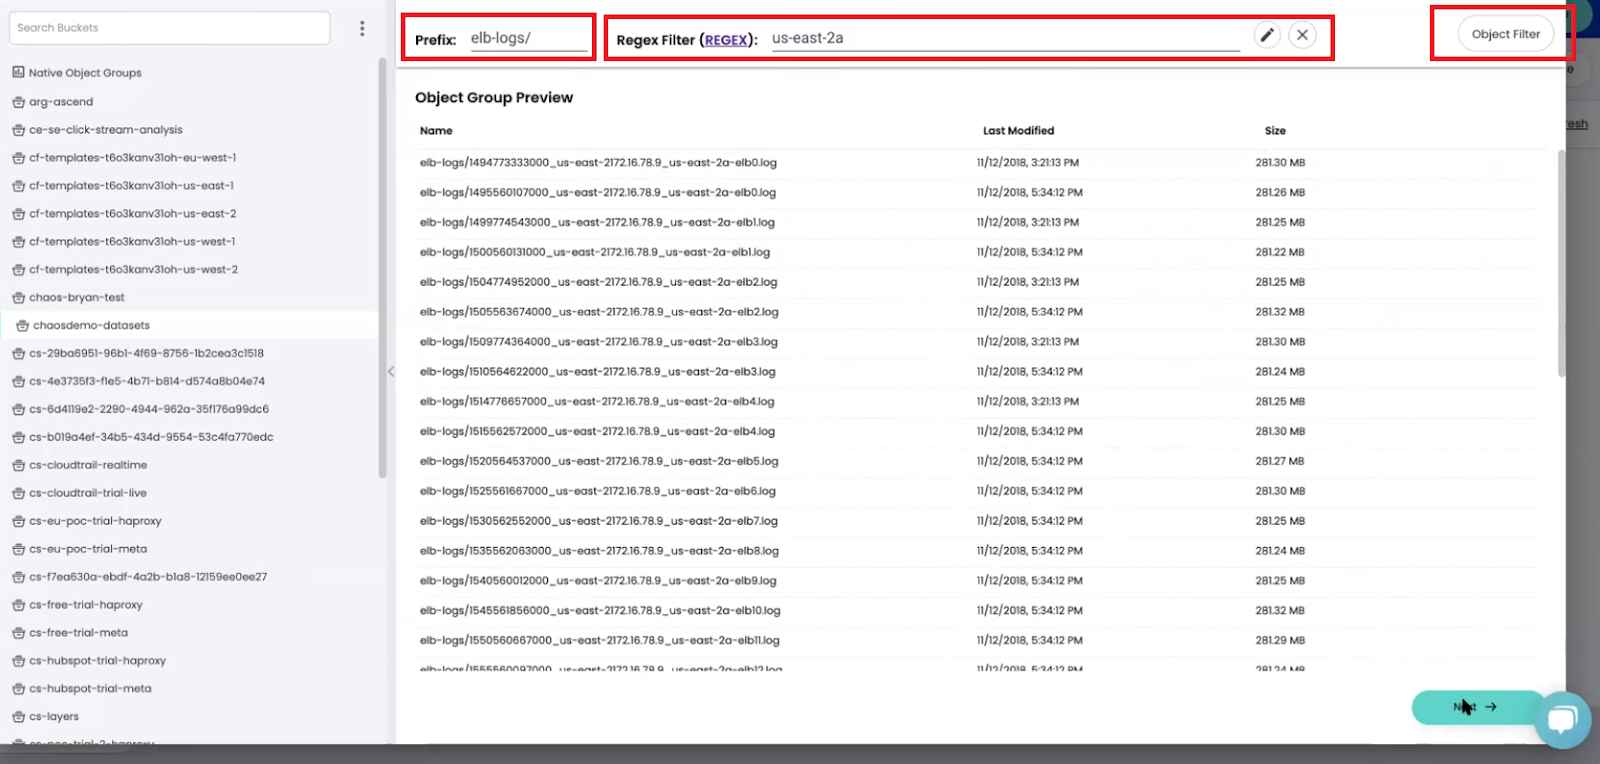
In the example above, our Amazon S3 bucket contains log files from multiple sources. Using ChaosSearch to define an object group that includes only log files from our elastic load balancer (ELB). Now we can create an index to search and analyze just those ELB logs effectively.
Once you’ve defined your new object group and clicked “Next,” you’ll see both a raw and a formatted preview of the selected data. Click on “Create Object Group” to create your new object group.
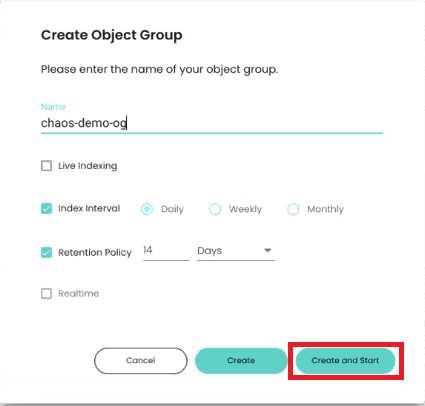
Before finalizing your new object group, you will be prompted to give it a name. You’ll also need to specify how frequently ChaosSearch should index new data in the object group (daily, weekly, monthly, or live) and how long the data should be retained.
Data indexed with ChaosSearch lives in your Amazon S3 buckets and has a tiny storage footprint, so many of our customers choose to store indexed data with no limit on data retention.
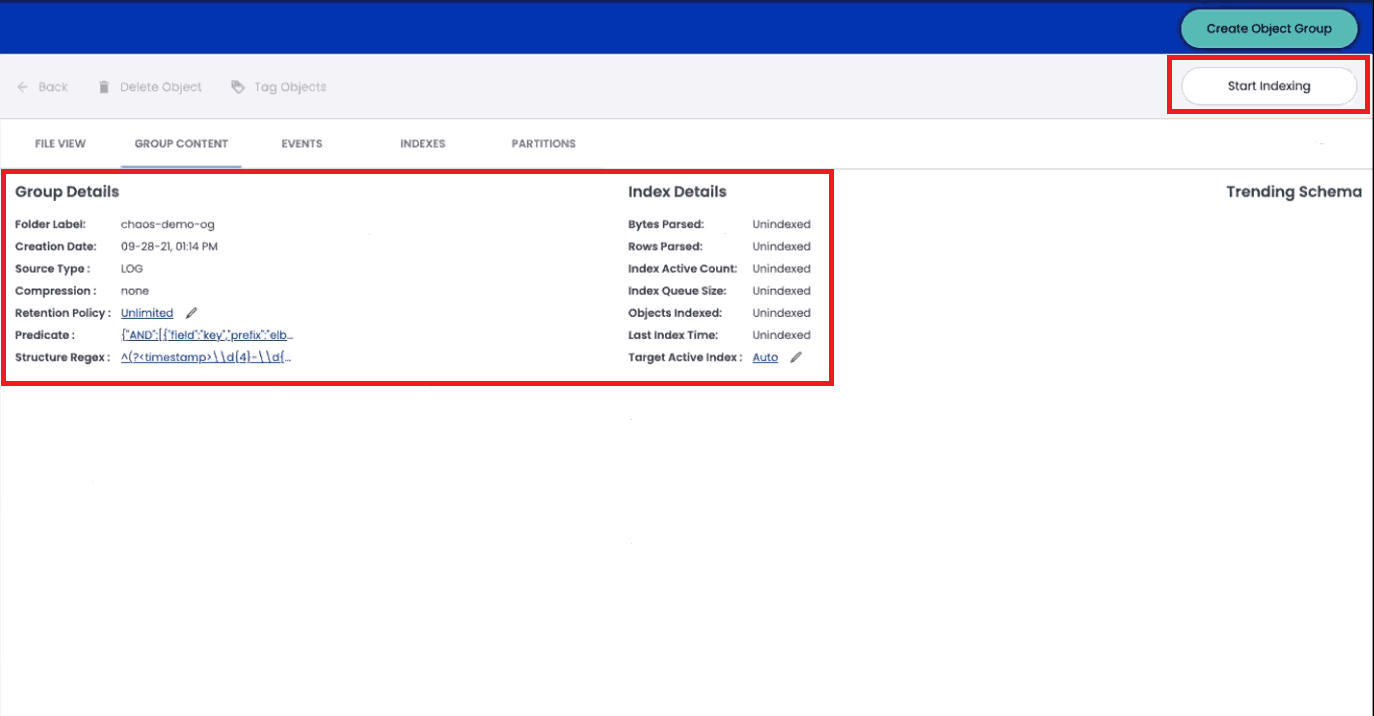
After finalizing your first object group, you will be able to create your first Chaos Index by clicking on “Start Indexing.”
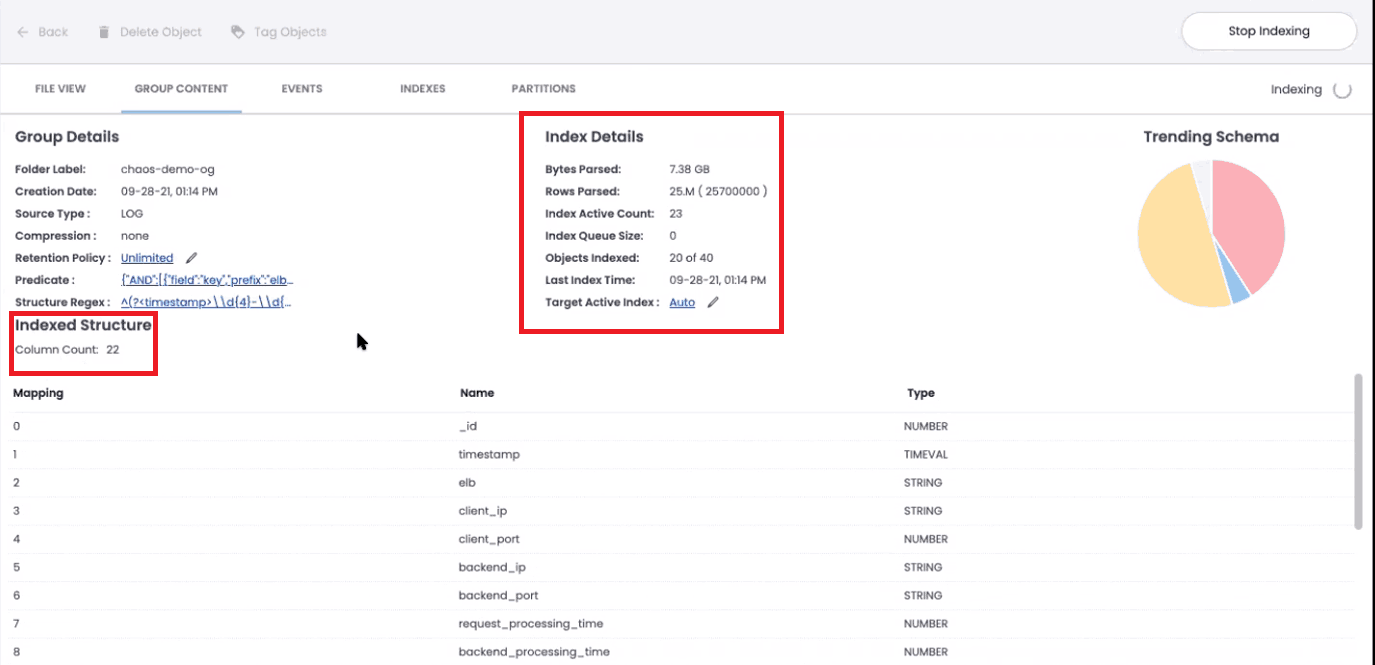
As ChaosSearch begins to index this data, you’ll be able to track its progress. Our interface will show you the number of objects indexed, bytes/rows parsed, and the number of columns in the index.
ChaosSearch detects schema automatically, so you won’t need to specify schema when creating an index. When adding new files to your object group with new columns or novel schema, ChaosSearch will detect the new schema when indexing and update your column count and mapping to reflect these changes.
READ: 10 AWS Data Lake Best Practices
After a few seconds, the indexing operation will conclude, and you’ll have created your first index using ChaosSearch.
Once your first index has been built, you’ll be able to start transforming your data and preparing it for analysis using Chaos Refinery.
Transform Your Data and Create Views With Chaos Refinery
Now that you’ve created your first index, it’s time to start transforming and preparing your data for analytics by creating index views.
To get started, you’ll need to navigate to the Chaos Refinery tab at the top of the page and click on “Create View.”
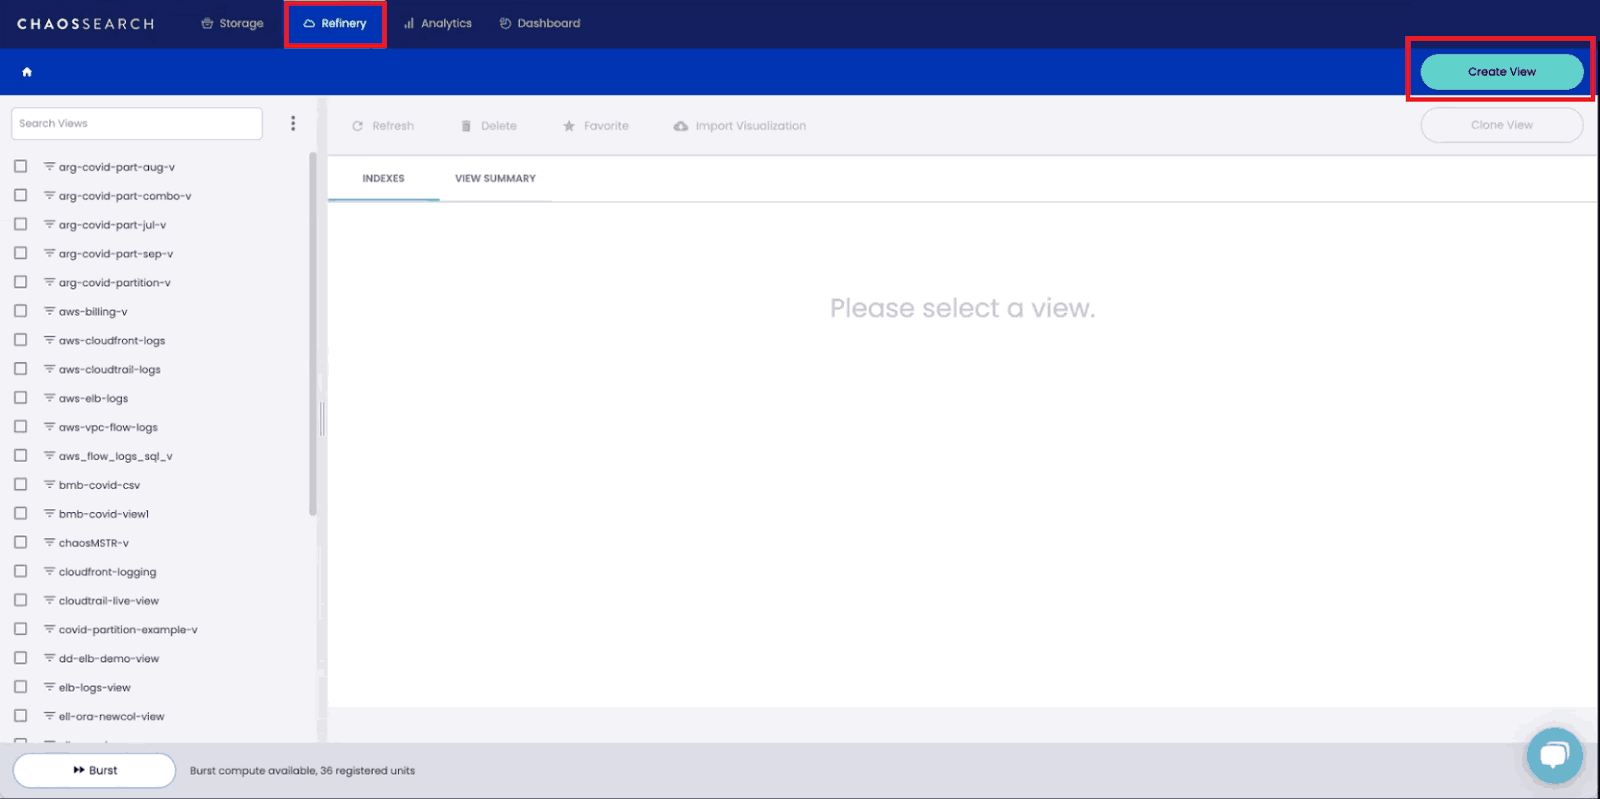
In ChaosSearch, an index view is a logical index based on the physical index you created using your data. Index views allow you to clean, prepare, and apply logical transformations to your data without modifying the source and with no data movement or replication.
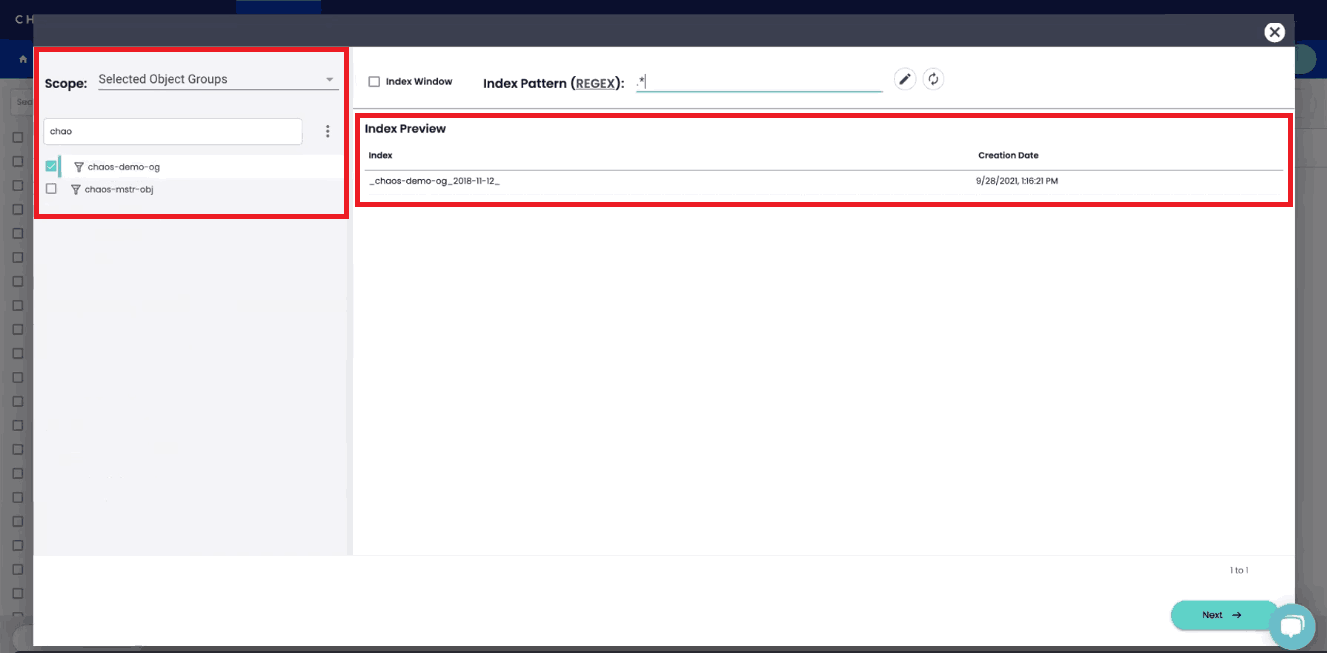
To start creating an index view, you’ll need to choose an object group and index to begin working with. You can specify details such as the index window (how much historical data should be included in this view?) or write a custom regular expression (regex) to include or exclude specific data from your index view.
To create your first View, you’ll probably want to use your newly created object group and include all indexed data.
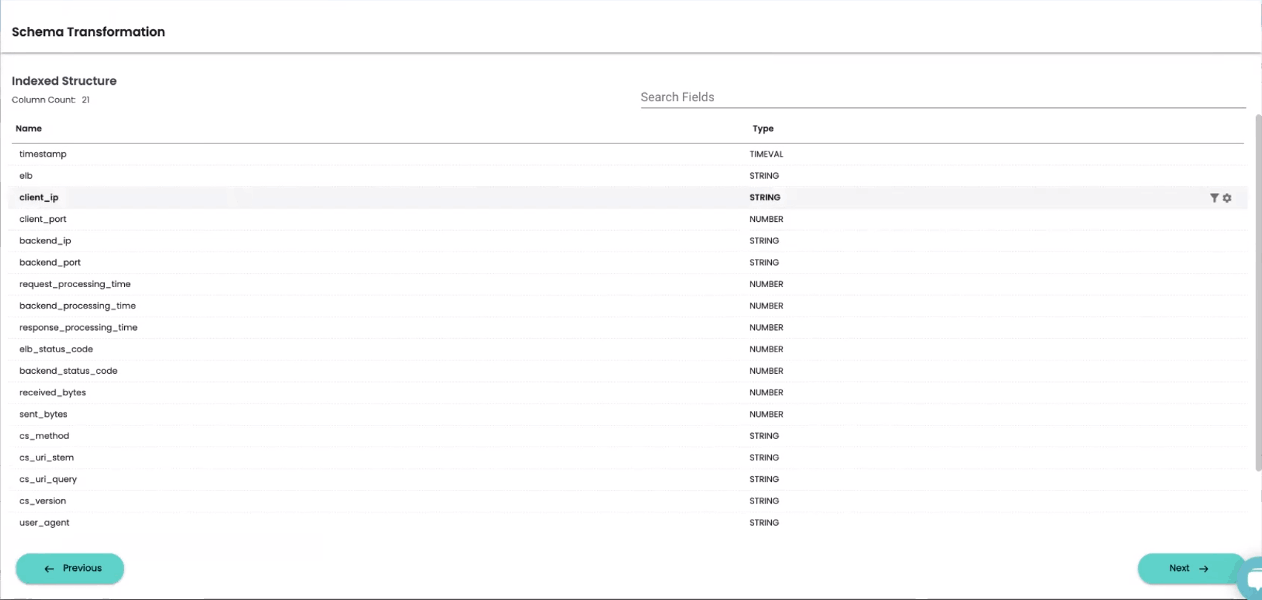
After clicking “Next,” you’ll have the opportunity to implement schema transformations before creating your index view to enable analytics on your data.
For each column in your index, you’ll be able to preview your data and apply transformations by writing regular expressions as needed to support your analytical use cases.
In creating your first View, you may choose to not change or transform any of the auto-discovered schema from ChaosSearch. It’s very easy to create new views as you get comfortable transforming columns or using Views with ChaosSearch’s RBAC features to control what end users can access certain data.
Once you’ve finished applying transformations to your data, clicking the “Next” button will prompt you to select a Timestamp field for your new index view. Specifying a timestamp column within your data allows you to build views and dashboards that visualize changes over time.
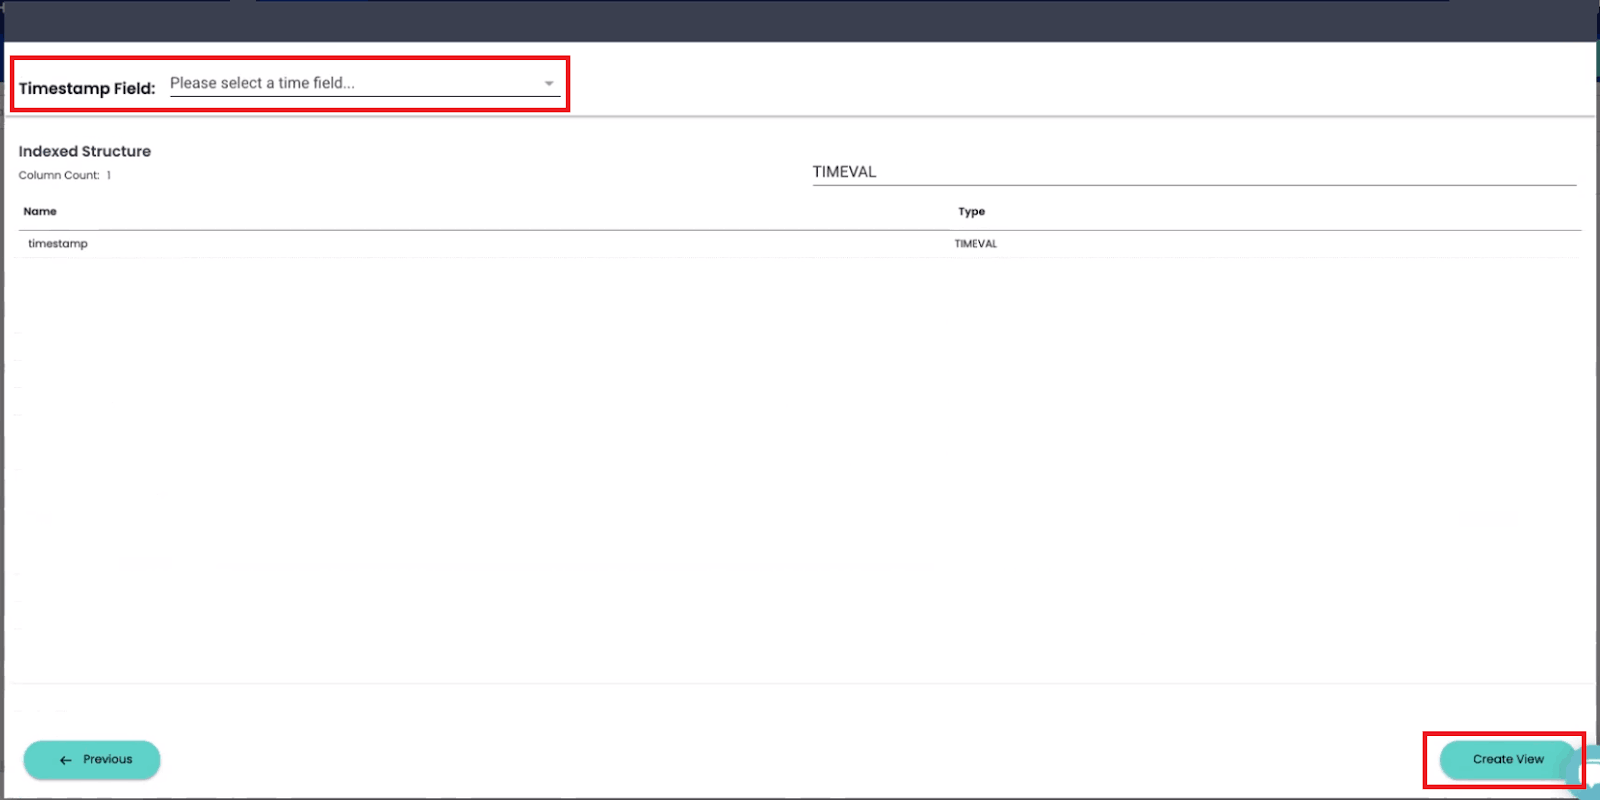
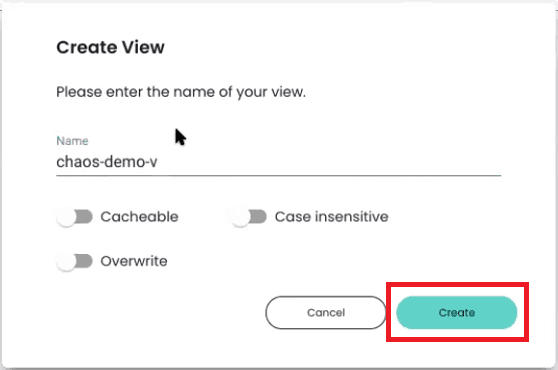
After indicating which column in your data contains a timestamp, click on “Create View.” You will get a prompt to enter a name for your new Index View.
You may also want to make your view cacheable. ChaosSearch built its own cache that allows index views to be stored in persistent memory to be queried more rapidly in the future.
Once you finish creating your Index View, you will be returned to the main page of the Chaos Refinery interface.
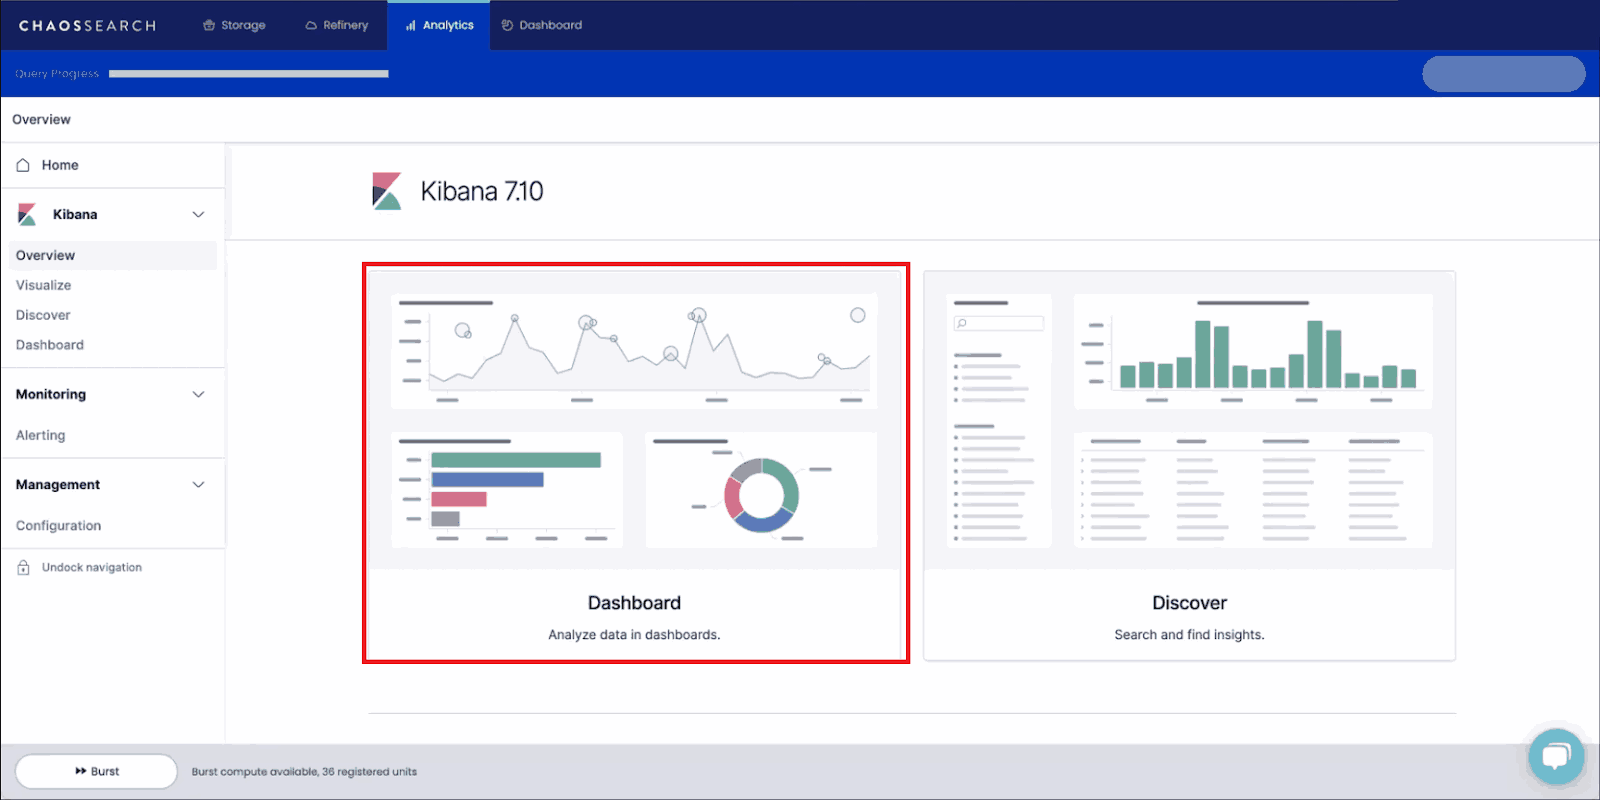
In the left sidebar, you should see the new index view you’ve just created and on which you can now perform ad-hoc queries and analytics, build visualizations and dashboards, monitor, alert and integrate with other systems like Slack, MS Teams, PagerDuty and more using the built-in OpenSearch Kibana on the Analytics tab.
Visualize and Dashboard Your Data with Kibana
Now that you’ve indexed your data and created an index view, you can create your first visualization and start analyzing your data with Kibana.
To help you along, we’ve put together and published an entirely separate guide on How to Create a Dashboard in Kibana.
Our guide details the functionality of Kibana in ChaosSearch, explaining all the most important details - from discovering your data to building visualizations and combining them into rich dashboards that deliver real-time insights.
Ready to Start Your Free Trial?
With use cases that range from application troubleshooting to security log analysis, ChaosSearch enables you to index, transform, search and analyze data at scale.
And with our streamlined and user-friendly trial experience, it takes just a few minutes to register your profile and convert your AWS data storage into an activated data lake for multi-API analytics.
What are you waiting for?

Additional Resources
Read the blog: Data Lake Architecture & The Future of Log Analytics
Watch the video: ChaosSearch Overview
Download the Eckerson report: Deep Dive on the Cloud Data Platform

